
SETUP
mac
- path里注册code命令,在Command Palette(ctrl+shift+p)里输入
shell command就能看见了,操作的是.bash_profile - touch bar support
GET START
基本使用
高级搜索
全局搜索的时候筛选文件,只支持少部分正则语法
example
./example   #必须是顶层的example
*to match one or more characters in a path segment?to match on one character in a path segment**to match any number of path segments, including none{}to group conditions (e.g.{**/*.html,**/*.txt}matches all HTML and text files)[]to declare a range of characters to match (e.g.,example.[0-9]to match onexample.0,example.1, …)
配置
分为两种:工作区配置和用户全局设置
{
     "editor.wordWrap": "on",   //多种配置方式,这是根据视区大小自动换行
}
自动保存
通过控制台输入setting快速打开
files.autoSave: 可以有以下的值
off - to disable auto save.
afterDelay - to save files after a configured delay.
onFocusChange - to save files when focus moves out of the editor of the dirty file.
onWindowChange - to save files when the focus moves out of the VS Code window.
files.autoSaveDelay: Configures the delay in milliseconds when files.autoSave is configured to afterDelay.
代理
Note: VS Code supports http and https proxies, but not SOCKS proxies.
Command Palette控制台
执行各种设置和命令,不一定要输入完整的命令,会有提示的
- theme、setting、keybord(快捷键)、snip、fold
- git(各种操作)
比如:git checkout
蓝色:改变的行,绿色:新的行,红色尖尖:被删除的行
选项里:撤销上次提交、显示git信息
特定语言配置
控制台输入Configure language就知道了
显示语言
控制台输入display
Key Bindings快捷键
有一些拓展,打包好了快捷键设置,可以模拟vim\sublime text等快捷键https://code.visualstudio.com/docs/getstarted/keybindings#_keymap-extensions
自定义
ctrl+k ctrl+s打开,可以查看目前的快捷键绑定,右击可以检测冲突
可选的控制按键
| Platform | Modifiers |
|---|---|
| macOS | ctrl+, shift+, alt+, cmd+ |
| Windows | ctrl+, shift+, alt+, win+ |
| Linux | ctrl+, shift+, alt+, meta+ |
默认
ctrl在mac下代表cmd,有些可能不一致
navigation 导航
ctrl+p          查看搜索打开目录下的所有的文件
ctrl+tab        切换打开的tab栏,按tab选择
ctrl+g          跳转到指定的行
Ctrl+Tab        Navigate entire history(当前打开tab的历史)
Alt+Left/Right  Windows: Navigate back/forward(鼠标焦点位置前后退/前进)
Ctrl+- / Ctrl+Shift+- Mac: navigate back/forward
ctrl+G          快速行跳转
F12或者ctrl+click     跳转到定义(悬停不点的时候也会有提示)
shift+F12       查找所有引用
cmd + up/down 文件树打开/关闭文件夹
选择/查找
ctrl+alt+up/down    列选择
shift+alt+click     块选择
ctrl+shift+left/right   快速选择
alt+up/down         选中后使用快捷键,整块代码向上/下移动
ctrl+shift+f        在打开的文件夹中寻找(可以选择文件搜索范围,支持正则表达式,反向引用:$1)
ctrl+f              在当前文件查找
ctrl+h              在当前文件中替换
ctrl+shift+o        快速查找本文件函数等symbol  和在控制台输入@效果一样,使用@:还可以让symbol分类显示
ctrl+t              查找工作区symbol
ctrl+i              选择当前行
快速选择的效果
鼠标下的块选择
编辑
ctrl+/              加/解注释
ctrl+alt+down/up    列编辑
alt+click           Multiple cursors多处编辑
shift+alt+up/down   快速复制本行到上/下
F2                  重命名变量之类的symbol(php不起作用)
#(注:ubuntu和本身快捷键冲突,按alt会弹出菜单,需要设置gsettings set org.gnome.desktop.wm.preferences mouse-button-modifier "<Super>")
窗口/其他
ctrl+shift+p        或者 F1 打开控制台
ctrl+\              将一个文档分分为两个窗口,最多三个,然后使用ctrl+1或2或3可以跳到对应的窗口
ctrl+`              启动终端
ctrl+b              打开/关闭左边侧边栏(sidebar)
ctrl+k ctrl+s       修改快捷键绑定
折叠
- Fold (
Ctrl+Shift+[) 折叠所在的这个部分 - Unfold (
Ctrl+Shift+]) 取消所在部分的折叠 - Fold All (
Ctrl+K Ctrl+0) 折叠当前编辑文件的所有可折叠部分 - Unfold All (
Ctrl+K Ctrl+J) 取消当当前文件所有折叠 - Fold Level X (
Ctrl+K Ctrl+2for level 2) 折叠所有level x(还可以用 ctrl+3、ctrl+4等)的缩进去(除了当前编辑位置所在的)
User Interface界面
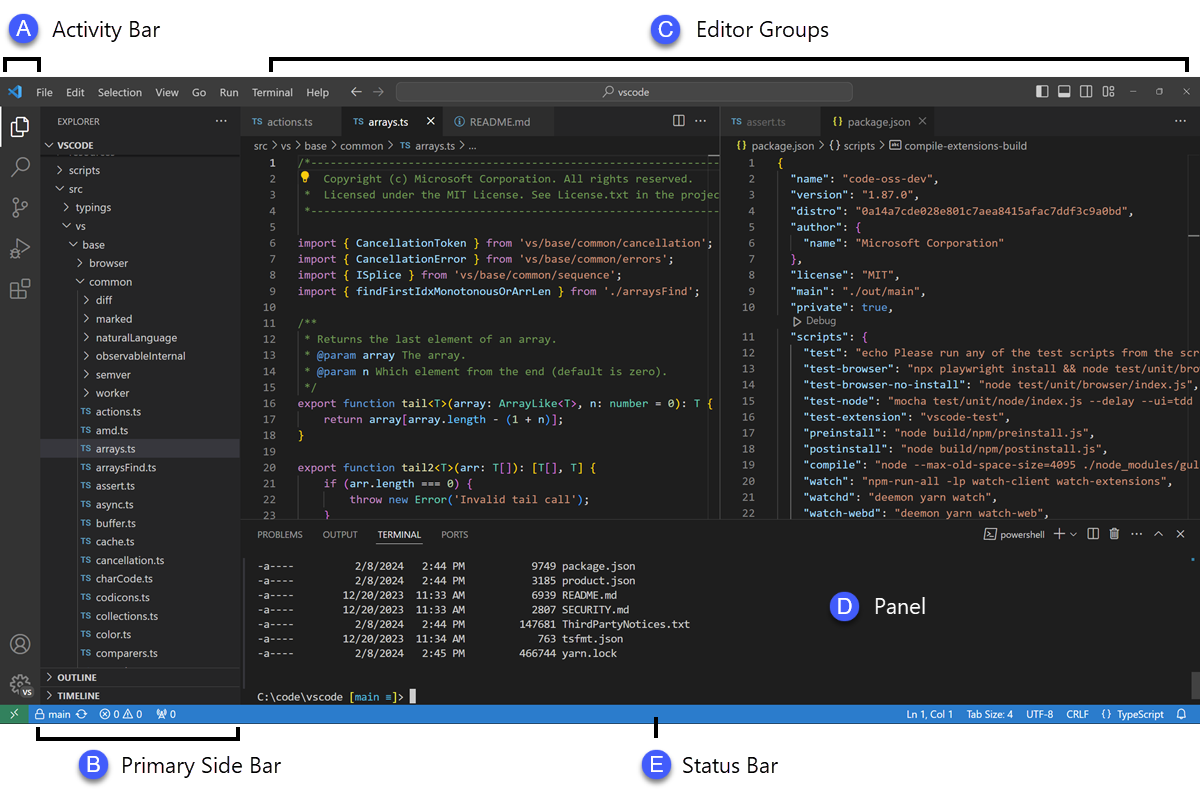
- view->editor Group有一些预定义的布局
- 可以控制是在一个新的tab预览还是在本tab,https://code.visualstudio.com/docs/getstarted/userinterface#_disable-preview-mode
- 窗口,可以直接拉动tab到对应的位置就可
IntelliSense 智能补全
配置
"editor.quickSuggestions": {
    "other": true,
    "comments": false,
    "strings": true //开启字符串的自动补全
},
配置suggestion不显示snippets:editor.snippetSuggestions:"none",
Debugging
debug需要又对应的配置才可以
除了可以加断点(条件断点、计数【一共达到这么多次才生效】),js、python、php等少数语言还可以加logpoints(在这个地方记录信息)
launch.json
一些重要的配置
preLaunchTask:debug前需要执行的数据,直接给task.json中任务的name就行postDebugTask:debug后需要指定的
部分语言的debugger支持的配置
program- executable or file to run when launching the debuggerargs- arguments passed to the program to debugenv- environment variables (the valuenullcan be used to "undefine" a variable)cwd- current working directory for finding dependencies and other filesport- port when attaching to a running processstopOnEntry- break immediately when the program launchesconsole- what kind of console to use, for example,internalConsole,integratedTerminal,externalTerminal.
Platform specific properties 平台相关配置
{
    "version": "0.2.0",
    "configurations": [
        {
            "type": "node",
            "request": "launch",
            "name": "Launch Program",
            "program": "${workspaceFolder}/node_modules/gulp/bin/gulpfile.js",
            "args": ["myFolder/path/app.js"],
            "windows": {    //windows执行的时候会用下边的args代替,其他还有osx、linux
                "args": ["myFolder\\path\\app.js"]
            }
        }
    ]
}
Global launch configuration 全局launch
在用户设置里边添加launch
"launch": {
    "version": "0.2.0",
    "configurations": [{
        "type": "node",
        "request": "launch",
        "name": "Launch Program",
        "program": "${file}"
    }]
}
Multi Debugging
比如server client这类涉及到多个程序的
Remote Debugging
Vscode不原声支持,决定于你使用的拓展
Vision Control
任意文件的比较:先右击文件选择Select for Compare,然后再右击另一个文件选择和已选项目进行比较
很方便,github pull request支持:https://code.visualstudio.com/docs/editor/versioncontrol#_working-with-pull-requests
Intergrated Teiminal 集成终端
配置
// Command Prompt
"terminal.integrated.shell.windows": "C:\\Windows\\System32\\cmd.exe"
// PowerShell
"terminal.integrated.shell.windows": "C:\\Windows\\System32\\WindowsPowerShell\\v1.0\\powershell.exe"
// Git Bash
"terminal.integrated.shell.windows": "C:\\Program Files\\Git\\bin\\bash.exe"
// Bash on Ubuntu (on Windows)
"terminal.integrated.shell.windows": "C:\\Windows\\System32\\bash.exe"

//shell参数
// Linux
"terminal.integrated.shellArgs.linux": ["-l"]
基本字体设置:https://code.visualstudio.com/docs/editor/integrated-terminal#_terminal-display-settings
复制快捷键:
- Linux: Ctrl+Shift+C and Ctrl+Shift+V
- macOS: Cmd+C and Cmd+V
- Windows: Ctrl+C and Ctrl+V
将选择的文本在当前终端运行,在控制台run selected
task 任务
Typescript、C#等语言有预定义的一些任务
tasks就是一些预定义的任务,必须在文件夹下才可以运行(因为人家需要有配置文件嘛)
Custom tasks 预定义任务
控制台输入task,然后就知道怎么做了,后边选others(任意任务),有示例
注意,任务的执行是和配置集成终端种类有关的,我配置的集成终端是bash on windows,所以实在bash下执行的
- 同样可以针对特定的操作系统配置
{
    "version": "2.0.0",
    "tasks": [
        {
            "label": "echo",    //用户界面显示的名称
            "type": "shell",    //自定义的可以是shell(这个一个shell命令)或者process(直接执行这个程序),
            "group":"test", //分类,可以是build、test,可以通过run test task来执行
            "command": "printenv",
            "args":[    //传递给命令的参数
                {
                    "value":"xxxx",
                    "quoting": "escape" //指定对内容的escape

                }
            ],
            "presentation":{    //控制命令的输出和终端的使用

            },
            "problemMatcher":[],    //错误捕获设置,例子可以参见后边的cpp的task的设置,vscode预定义的一些,很多js的,还有GO的($go)、VB和C#的,C++ extension已经定义了gcc默认的matcher
            "options":{
                "cwd":"/mnt/d/code",
                "env":{ //wsl的环境变量支持有问题,设置不生效
                    "MY_NAME":"jcuan"
                },
                "shell":{   //shell执行的一些配置
                    "executable": "bash",
                    "args": [
                        "-c"
                    ]
                },
            }
        }
    ]
}
- 绑定测试任务快捷键
{
    "key": "ctrl+h",
    "command": "workbench.action.tasks.runTask",
    "args": "Run tests"
}
task配置中会使用到的变量
${workspaceRoot} VS Code当前打开的文件夹
${file} 当前打开的文件
${relativeFile} 相对于workspaceRoot的相对路径
${fileBasename} 当前打开文件的文件名
${fileDirname} 所在的文件夹,是绝对路径
${fileExtname} 当前打开文件的拓展名,如.json
${cwd} the task runner's current working directory on startup
使用环境变量${env.Name} (e.g. ${env.PATH}),使用配置信息${config:python.pythonPath}
多行错误信息和后台task信息反馈:https://code.visualstudio.com/docs/editor/tasks#_defining-a-multiline-problem-matcher
snippets设置和使用代码块
   "For Loop": {
        "prefix": "for",
        "body": [
            "for (var ${index} = 0; ${index} < ${array}.length; ${index}++) {",
            "\tvar ${element} = ${array}[${index}];",
            "\t$0",
            "}"
        ],
        "description": "For Loop"
    },
For Loop代码块的名字prefix定义触发的关键词body内容description输入关键词触发snippets的提示信息
可选的变量:
$1, $2tab 停止的地方${id}定义变量(填空的地方),如${lable}是变量相同id的文件会被绑定到一起同时编辑
注
如果你的代码含有{ or}, 需要转义,如\\{ and \\}
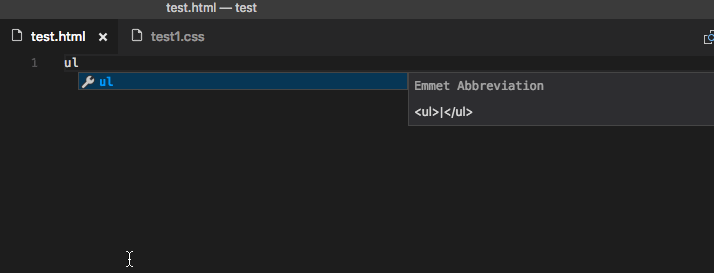
Emmet
html,超级牛逼的补全,vscode自带,不用任何拓展
还可以很骚的在snippets里边使用emmet
WSL适配
现在bas on windows已经很6了,可以在bash里直接执行exe文件,vscode可以通过一些文件参数的转换使用linux下的工具
首先要知道
wslpath D://code/php #这个会返回/mnt/d/code/php linux可以执行这个命令将windows下的path转换成linux下的
php
@GioBonvi 在 https://github.com/Microsoft/vscode/issues/22391 指出了两个脚本,我只使用第一个脚本。第二个脚本在换行符转换上有问题,返回内容会被修改,而且xdebug调试不能实时获得输出
下边是这个脚本文件,需要修改的是set v_params=%v_params:D:=/mnt/d%这一行,在哪个盘就修改成哪个盘
@echo OFF
setlocal ENABLEDELAYEDEXPANSION

rem Collect the arguments and replace:
rem  '\' with '/'
rem  'c:' with 'mnt/c'
rem  '"' with '\"'
set v_params=%*
set v_params=%v_params:\=/%
set v_params=%v_params:D:=/mnt/d%
set v_params=%v_params%
set v_params=%v_params:"=\"%

rem Call the windows-php inside WSL.
rem windows-php is just a script which passes the arguments onto
rem the original php executable and converts its output from UNIX
rem syntax to Windows syntax.
C:\Windows\sysnative\bash.exe -l -c "php %v_params%"
1.将配置里的php.validate.executablePath改为上边哪个cmd文件的位置,
2.现在xdebug还需要配置远程调试,重点就是在pathMapping
{
    // 使用 IntelliSense 了解相关属性。
    // 悬停以查看现有属性的描述。
    // 欲了解更多信息,请访问: https://go.microsoft.com/fwlink/?linkid=830387
    "version": "0.2.0",
    "configurations": [
        {
            "name": "Listen for XDebug",
            "type": "php",
            "request": "launch",
            "port": 9000,
            "pathMappings": {
                "/mnt/d/code/php2/worktest": "${workspaceRoot}"
            }
        },
        {
            "name": "Launch currently open script",
            "type": "php",
            "request": "launch",
            "program": "${file}",
            "cwd": "${fileDirname}",
            "runtimeExecutable":"${config:php.validate.executablePath}",
            "port": 9000,
            "pathMappings": {
                "/mnt/d/code/php2/worktest": "${workspaceRoot}"
            }
        }
    ]
}
通用拓展
vim
- gd 跳转到定义
- gb 多鼠标,注意在visual模式下是不能使用i进入插入模式的,需要回到normal再进入
- gh 相当于鼠标移动到上百年 显示函数提示啥的
- 配置不被vscodevim处理的快捷键
"vim.handleKeys": {
"": false
} - 如果要使用复制,ctrl+shift+v是可用的,但是markdown文件不可用,因为和预览冲突
特定语言
C/CPP
note:觉得这些拓展的功能还是太弱了,居然上边定义的变量都没有提示。kdevelop还不错,界面也挺棒的,强烈推荐。这个拓展越来越牛了
灵活一点的debug需要使用make、gdb 。
右击断点可以设置条件断点,监控栏可以监控一些表达式。
调试配置
- 配置launch.json
"program": "${workspaceRoot}/a.out", //make build生成的文件的名字,不要叫build "preLaunchTask": "build" - 配置tasks没必要定义problemMatcher,这个拓展自带了
{ // See https://go.microsoft.com/fwlink/?LinkId=733558 // for the documentation about the tasks.json format
    "version": "2.0.0",
    "tasks": [
        {
            "label": "clean",
            "type": "shell",
            "command": "make clean",
        },
        {
            "label": "build",
            "type": "shell",
            "command": "make build",
            "presentation": {
                "echo": false,
                "reveal": "never",
                "focus": false,
                "panel": "shared",
                "showReuseMessage": true
            }
    ]
}
PHP
- php Debug棒的不行
需要在setting.json里设置"php.validate.executablePath": "/usr/bin/php" - php docblocker
- php IntelliSense Ben Mewburn的这个,首先index的速度可以,然后功能特别丰富,基本的文档注释也是parse的
- 注意vscode xdebug的一个问题,如果监控信息栏有错误的监控变量或者表达式之类的,可能造成调试在断点暂停之后无法继续,删除这个监控的就可以了
Markdown
对于重度markdown使用者,请使用typora,不会后悔
python
拓展推荐:python 就是搜python排名最高那个,安装之后右击查看强大功能
调试配置(只截取修改部分):
在用户配置(可通过console控制台里输setting打开)里面将python改为运行python命令的地址,如果在终端中可以直接运行python命令,只输入python也可以
下边python文件中的pythonpath也是指的python命令地址
    "configurations": [
        {
            "name": "Python",
            "type": "python",
            "request": "launch",
            "stopOnEntry": true,
            "pythonPath": "${config.python.pythonPath}",
            "program": "${file}",
            "debugOptions": [
                "WaitOnAbnormalExit",
                "WaitOnNormalExit",
                "RedirectOutput"
            ]
        },
        {
            "name": "Flask",
            "type": "python",
            "request": "launch",
            "stopOnEntry": false,
            "pythonPath": "${config.python.pythonPath}",        //如果需要用venv里面的python,需要把这个改成python命令位置,类似这样的/home/jcuan/code/python/project/venv/bin/python
            "program": "/home/jcuan/code/python/project/venv/bin/flask",        //flask命令地址,flask0.11之后可以通过flask run的方式来运行python,不过需要一些配置,比如FLASK_APP环境变量的设置,可以通过运行 flask --help 和flask  run --help来查看帮助
            "env": {
                "FLASK_APP": "${workspaceRoot}/app/__init__.py"        //设置必要环境变量,这个文件就是你项目开始的那个文件
            },
            "args": [            //运行flask命令的参数
                "run",
                "--no-debugger",
                "--no-reload"
            ],
            "debugOptions": [
                "WaitOnAbnormalExit",
                "WaitOnNormalExit",
                "RedirectOutput"
            ]
        }
我的__init__.py大概像这样的,
from flask import Flask

app = Flask(__name__, static_folder='statics', static_url_path='/static')
app.config.from_pyfile('config.py')

import hello
Hits: 353